BOGIE REPAIR
These pictures depict the bogie frame repair of my frame off restoration project---1975 Palm Beach
My hope it is helpful and enjoyable to you
AS ALWAYS USE AT YOUR OWN RISK

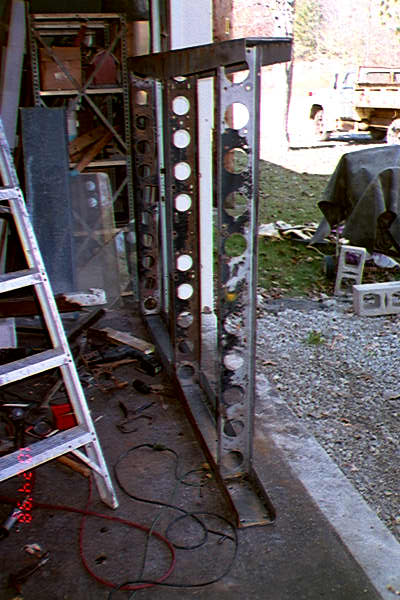
Little did I know I would be making websites when I took these pictures-if I knew, I would have documented it better. This picture depicts somewhat of what I did; however, I was pretty far along by this time. My bogie frame was rusted where the bogie and frame rail are sandwiched together. Most of the rusted area was approx. 6 inches toward the rear of bogie wheel attachment. I will try and describe what I would do now to get to this stage in my bogie repair. My bogie frame is 88" long along the outside rail and the inside dimension of the u channel is 5 3/8. I had a 1/4 inch steel plate cut 88" long and 5 5/16" wide. In the picture you can see where the crossmember meets the inside bogie rail. Fortunately for us it is welded about 3/8 of an inch away from the u channel. This allows us to slip the plate inside the u channel, leaving the outside dimension of the bogie frame the same. There are 2 angle braces in the center of my bogie on each side for reinforcement which I cut out using die grinder and whizzer wheel.(2nd last picture) The objective here was to cut the weldaments as close as possible to where they were welded so I could re-weld them back into position later.. With a little messing around with a carbide tipped air grinder and whizzer wheel all of my pinch points that prevented me from slipping my plate in were overcome. I ground down the edges of my new plate with an electric grinder($60 at Sears). I made the plate so it would fit the contour of the bend in the bogie u channel nice and close. Next, I would clamp the plate into position and use the transfer punches to mark the holes from the outside. Make sure you reference your work so it goes in exactly as you took it out. Remove the plate, drill the holes. At this point I would suggest sandblasting the U channels inside and out and the new plates.( I did not sand blast the outside and wish I had at this point--when I did sandblast the outside on mine I had already welded the plate, now I have sand particles albeit a few bwt my new plate and old inside U channel--you don't have to!) After sandblasting, I cleaned the mating surfaces, and applied 3M's Weld-Through Coating #05913, a weldable corrosion resistant coating because not to do so would have left two bare metal surfaces sandwiched together and thus rust quicker. Next I reinstalled the new plates in there proper place, put some bolts through and also clamped every 2'. I mig welded the pieces together approx. 1 1/2 " apart so I would not distort the metal from welding.
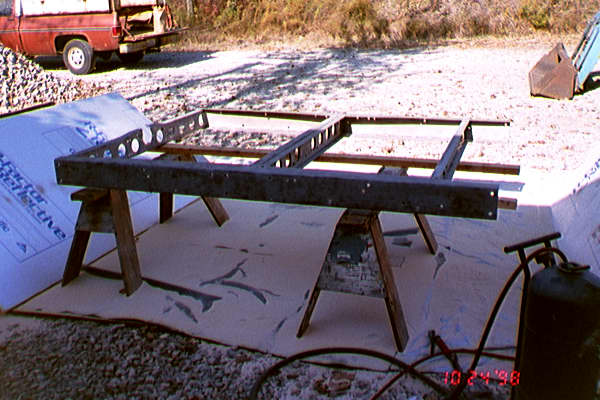
Both plates are in and welded. If you could look left you would see the most beautiful wood 23' Lyman boat owned by a friend. Under the black tarp is a cement mixer which made the concrete sill just right of bogie frame. Concrete blocks are from the wall I removed to put in this garage door and the old dump still moves dirt around the property. This view is looking West.
Bogie frame being sandblasted. Then primed and painted. 78 GMC 3/4 ton truck used to pickup 16'8" fabricated side rails on ladder rack, looking North.
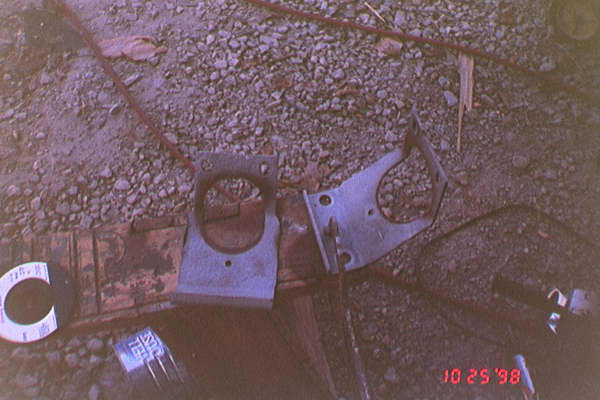
This picture shows the braces that are part of the area where the bogie wheels attach to the bogie frame. Since I had added an additional 1/4 inch in thickness to the bogie rail, the large hole(the exhaust pipe goes through it) had to be ground away the additional 1/4 inch. I used a die grinder and carbide bit and clamped it as you see to a saw horse. The small holes through the crossmembers had to be relocated a 1/4 inch also. I then mig welded them back into the original area however 1/4 inch from original.
Sometime later?
04/10/01